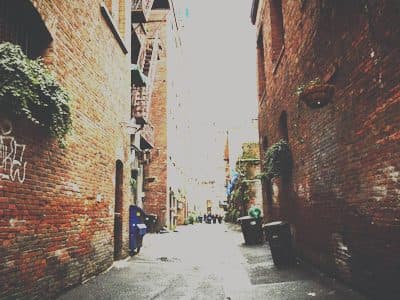
 47 scenes
Simulated preview
Emulation
Video · XMP editing preset
Velvia 50 Video is an XMP editing preset from the video collection. Compare it on sample scenes before downloading.
By peva3 · MIT
Simulated preview. Adobe profiles, masks, white balance, grain and detail effects are not reproduced. The Lightroom / Camera Raw result may differ.
Drag across the photo to compare, then try 47 sample scenes or your own photo.Explore film looks on 47 sample scenes or your own photo. Press and hold to compare the original, adjust intensity and export a high-quality JPEG.
Sample photos
Simulated preview rendered on your device. Download the original XMP to apply the preset in Lightroom or Camera Raw; required Adobe profiles are not included.
Sample photo: Z Recipe Builder · original source .
Values read from the original file. “Not set” means the preset does not specify that setting; it does not mean zero. This viewer includes settings the simulated preview cannot render.
| Color | Hue | Saturation | Luminance | B&W mix |
|---|---|---|---|---|
| Red | 15 | 22.5 | Not set | Not set |
| Orange | -10 | 20 | 7.5 | Not set |
| Yellow | -17.5 | 12.5 | 7.5 | Not set |
| Green | 22.5 | 35 | -15 | Not set |
| Aqua | 15 | -15 | -15 | Not set |
| Blue | -7.5 | 26.3 | -22.5 | Not set |
| Purple | 15 | 15 | Not set | Not set |
| Magenta | 10 | 20 | Not set | Not set |
5 control points
5 control points
5 control points
5 control points
Not set by this preset.
These file flags are not confirmation that a particular Adobe application/version has been tested.
Original MIT license bundled from immutable snapshot f22f4d8057aaaada6df3f0ed7fbe6b952a30db77.
Settings SHA-256 v1: 152628a5c16a8e097888a751677317a6d4f88454e29f4210ae7e7e4021e34c72
File SHA-256: c62f64393b53bb3fd09c27ea6dc79daae50f3a70ff4fcab812d6d8affe3eeae6
{
  "crs:Name": {
    "rdf:Alt": {
      "rdf:li": {
        "#text": "Velvia 50 Video",
        "@_xml:lang": "x-default"
      }
    }
  },
  "crs:Group": {
    "rdf:Alt": {
      "rdf:li": {
        "#text": "Video",
        "@_xml:lang": "x-default"
      }
    }
  },
  "crs:Look": {
    "rdf:Description": {
      "crs:Group": {
        "rdf:Alt": {
          "rdf:li": {
            "#text": "Profiles",
            "@_xml:lang": "x-default"
          }
        }
      },
      "@_crs:Name": "Adobe Color",
      "@_crs:Amount": "1.000000",
      "@_crs:UUID": "B952C21111114111B1115456789ABCDE",
      "@_crs:SupportsAmount": "True",
      "@_crs:SupportsMonochrome": "False",
      "@_crs:SupportsOutputReferred": "True"
    }
  },
  "crs:ToneCurvePV2012": {
    "rdf:Seq": {
      "rdf:li": [
        "0, 0",
        "42, 28",
        "128, 128",
        "213, 230",
        "255, 255"
      ]
    }
  },
  "crs:ToneCurvePV2012Red": {
    "rdf:Seq": {
      "rdf:li": [
        "0, 0",
        "42, 28",
        "128, 128",
        "213, 230",
        "255, 255"
      ]
    }
  },
  "crs:ToneCurvePV2012Green": {
    "rdf:Seq": {
      "rdf:li": [
        "0, 0",
        "42, 28",
        "128, 128",
        "213, 230",
        "255, 255"
      ]
    }
  },
  "crs:ToneCurvePV2012Blue": {
    "rdf:Seq": {
      "rdf:li": [
        "0, 0",
        "42, 28",
        "128, 128",
        "213, 230",
        "255, 255"
      ]
    }
  },
  "@_rdf:about": "",
  "@_crs:PresetType": "Normal",
  "@_crs:Cluster": "",
  "@_crs:UUID": "4C6BEE78F5D041C0B4422D303988A220",
  "@_crs:SupportsAmount": "True",
  "@_crs:SupportsColor": "True",
  "@_crs:SupportsMonochrome": "False",
  "@_crs:SupportsHighDynamicRange": "True",
  "@_crs:SupportsNormalDynamicRange": "True",
  "@_crs:SupportsSceneReferred": "True",
  "@_crs:SupportsOutputReferred": "True",
  "@_crs:RequiresRenditionBehavior": "True",
  "@_crs:Name": "Velvia 50 Video",
  "@_crs:Treatment": "Color",
  "@_crs:ProcessVersion": "15.4",
  "@_crs:HasSettings": "True",
  "@_crs:Sharpness": "10",
  "@_crs:LuminanceSmoothing": "0",
  "@_crs:Blacks2012": "-20",
  "@_crs:Clarity2012": "0",
  "@_crs:Contrast2012": "35",
  "@_crs:GrainAmount": "5",
  "@_crs:GrainFrequency": "50",
  "@_crs:GrainSize": "20",
  "@_crs:Highlights2012": "-73",
  "@_crs:HueAdjustmentRed": "+15",
  "@_crs:HueAdjustmentOrange": "-10",
  "@_crs:HueAdjustmentYellow": "-17.5",
  "@_crs:HueAdjustmentGreen": "+22.5",
  "@_crs:HueAdjustmentAqua": "+15",
  "@_crs:HueAdjustmentBlue": "-7.5",
  "@_crs:HueAdjustmentPurple": "+15",
  "@_crs:HueAdjustmentMagenta": "+10",
  "@_crs:LuminanceAdjustmentOrange": "+7.5",
  "@_crs:LuminanceAdjustmentYellow": "+7.5",
  "@_crs:LuminanceAdjustmentGreen": "-15",
  "@_crs:LuminanceAdjustmentAqua": "-15",
  "@_crs:LuminanceAdjustmentBlue": "-22.5",
  "@_crs:Saturation": "-5",
  "@_crs:SaturationAdjustmentRed": "+22.5",
  "@_crs:SaturationAdjustmentOrange": "+20",
  "@_crs:SaturationAdjustmentYellow": "+12.5",
  "@_crs:SaturationAdjustmentGreen": "+35",
  "@_crs:SaturationAdjustmentAqua": "-15",
  "@_crs:SaturationAdjustmentBlue": "+26.3",
  "@_crs:SaturationAdjustmentPurple": "+15",
  "@_crs:SaturationAdjustmentMagenta": "+20",
  "@_crs:Shadows2012": "-30",
  "@_crs:Texture": "0",
  "@_crs:Whites2012": "+15",
  "@_crs:ColorGradeMidtoneHue": "0",
  "@_crs:ColorGradeMidtoneSat": "0",
  "@_crs:ColorGradeMidtoneLum": "0",
  "@_crs:ColorGradeHighlightHue": "50",
  "@_crs:ColorGradeHighlightSat": "7.5",
  "@_crs:ColorGradeHighlightLum": "0",
  "@_crs:ColorGradeShadowHue": "230",
  "@_crs:ColorGradeShadowSat": "10",
  "@_crs:ColorGradeShadowLum": "0",
  "@_crs:ColorGradeGlobalHue": "0",
  "@_crs:ColorGradeGlobalSat": "0",
  "@_crs:ColorGradeGlobalLum": "0",
  "@_crs:ColorGradeBlending": "75",
  "@_crs:ColorGradeBalance": "-5",
  "@_crs:Amount": "1.000000",
  "@_crs:Dehaze": "0"
}Choose your device for import instructions. Menu names may vary by app version.
Save the .XMP file to Files. If you downloaded a ZIP, tap it in Files to extract it.
Open Lightroom and select a photo to edit.
Open Presets, tap the three-dot menu, then choose Import Presets and select your .XMP file.
Look in User Presets or the imported preset group. If Import Presets is unavailable, import on Lightroom desktop and sync with the same Adobe account.
Start with a well-exposed photo. Adjust exposure and white balance after applying the preset; camera profiles and the original lighting can change the result.
Lightroom Classic: Not yet tested
Lightroom desktop: Not yet tested
Lightroom mobile: Not yet tested
Camera Raw: Not yet tested
Additional camera profiles referenced by the XMP may be required. Check the preset in your Adobe app before using it for a project.
Lightroom Classic: Develop → Presets → + → Import Presets. Select the downloaded XMP.
Lightroom desktop: open a photo, then Presets → menu → Import Presets. For mobile, import through the Presets menu where supported, or sync presets from Lightroom desktop using the same Adobe account.
Camera Raw: open Presets, then use its menu to import profiles and presets. XMP settings and required profiles must be supported by your installed version.
Unzip the bundle before import. It contains the unchanged XMP, 47 simulated JPEG previews, source credits and the original license; Adobe profiles are not included.
Source: peva3 / original preset · Original MIT license.
47 scenesEmulation
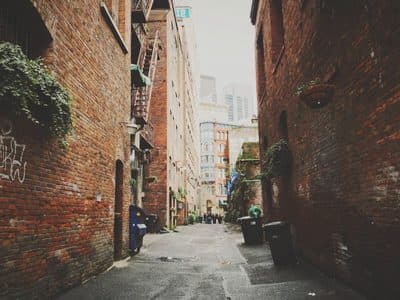 47 scenes
Emulation
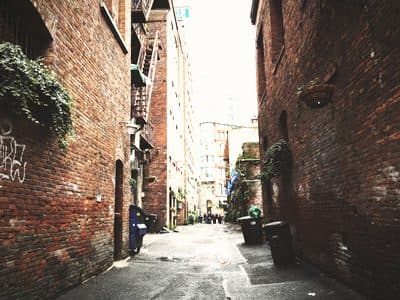 47 scenes
Emulation
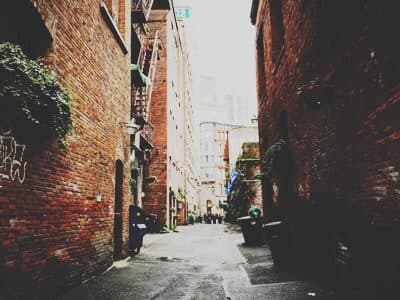 47 scenes
Original
Velvia 50 Video
Lightroom & Camera Raw